
A seam guide is an essential tool for precise fabric alignment and straight stitching on sewing machines, enhancing accuracy and consistency in various sewing projects․
1․1 What is a Seam Guide?
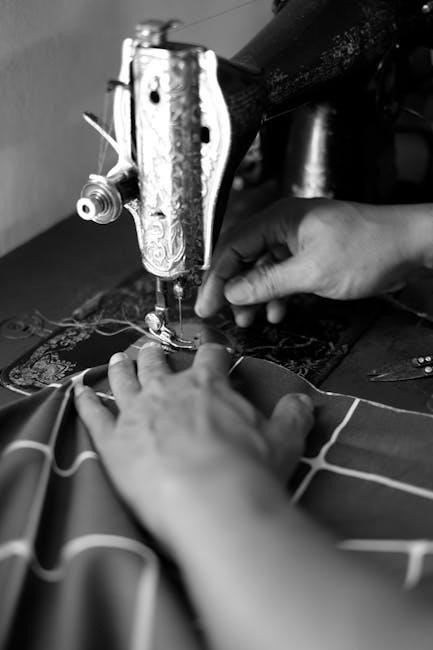
A seam guide is a tool used on sewing machines to help maintain straight stitching and precise fabric alignment․ It can be magnetic or a ruler attachment, providing consistent seam allowances․ Designed to enhance accuracy, it ensures parallel stitching and reduces errors․ Commonly placed near the presser foot, it guides fabric movement, making it ideal for quilting, hemming, and sewing straight lines․ Its versatile design supports various fabric types and projects, offering reliability and efficiency for both beginners and experienced sewists․
1․2 Importance of Using a Seam Guide in Sewing
Using a seam guide ensures precise fabric alignment and consistent stitching, enhancing the quality of your sewing projects․ It helps maintain straight lines and accurate seam allowances, reducing errors and saving time․ The guide is especially useful for beginners, as it simplifies achieving professional results․ It also boosts efficiency for experienced sewists by minimizing retries and ensuring uniformity in stitching․ This tool is indispensable for projects requiring precision, such as quilting, hemming, or working with delicate fabrics․
Types of Seam Guides Available
There are two primary types of seam guides: magnetic and ruler․ Magnetic guides attach to the needle plate, aiding in straight stitching, while ruler guides offer markings for precise seam allowances․
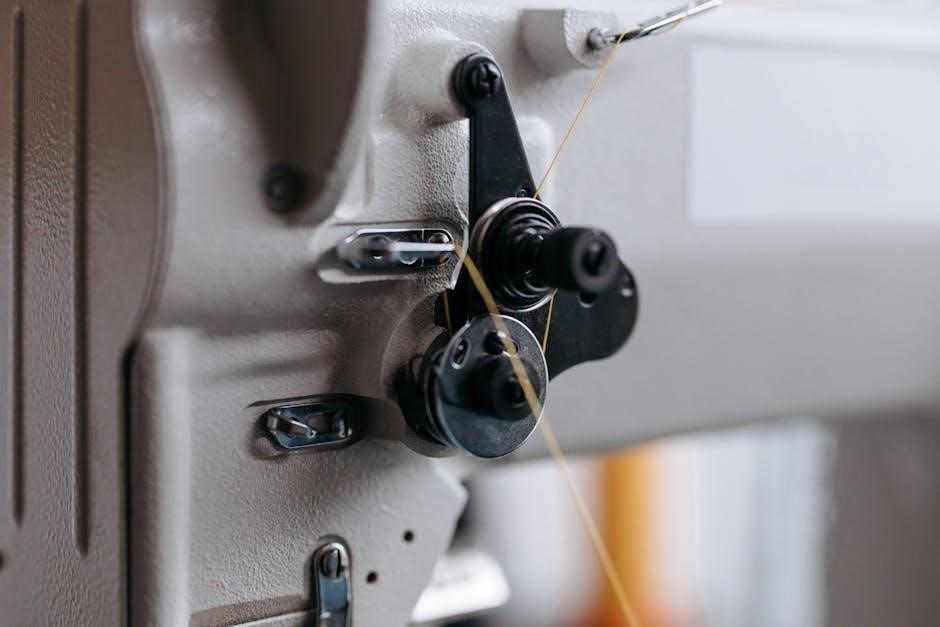
2․1 Magnetic Seam Guide
A magnetic seam guide attaches securely to the sewing machine’s needle plate, providing consistent alignment for straight stitching․ Its strong magnetic base ensures stability, allowing precise fabric control․ Easy to install, it’s ideal for maintaining accurate seam allowances without additional adjustments․ Suitable for various projects, it enhances sewing efficiency and is compatible with most machines․ This tool is particularly useful for beginners and experienced sewists alike, ensuring professional results every time․
2․2 Ruler Seam Guide
A ruler seam guide offers precise measurements for consistent stitching․ It features markings at quarter-inch intervals, extending up to 5-1/4 inches on one side and 2-3/4 inches on the other․ This tool attaches securely under the presser foot or clips to the machine, ensuring accurate fabric alignment․ Its clear markings allow for easy adjustment of seam allowances, making it ideal for both straight stitching and intricate projects․ A favorite among sewists, it enhances precision and versatility in various sewing tasks․
How to Install a Seam Guide on Your Sewing Machine
Attach the seam guide under the presser foot or clip it to the machine, aligning it with the needle plate markings for accurate fabric guidance and straight stitching․
3․1 Attaching the Magnetic Seam Guide
To attach the magnetic seam guide, place it on the needle plate under the presser foot, ensuring it aligns with the desired stitch width markings․ Gently press the magnetic edge to secure it․ Make sure the guide is parallel to the presser foot and does not obstruct the needle’s movement․ Test the alignment by running a scrap fabric through the machine to ensure accurate stitching․ Adjust if necessary for proper fit and functionality․
3․2 Setting Up the Ruler Seam Guide
Position the ruler seam guide alongside the presser foot, aligning it with the stitch width markings on the needle plate․ Secure it by tightening the screw or clip provided․ Ensure the ruler is parallel and does not interfere with the needle․ Adjust the guide to match your desired seam allowance․ Use the markings on the ruler to maintain consistent alignment while sewing․ Test with scrap fabric to confirm proper setup and make any necessary adjustments for accuracy․
Using the Seam Guide for Straight Stitching
A seam guide ensures precise fabric alignment for straight stitching, helping maintain consistent seams and professional results․ Use it to keep your stitches even and aligned․
4․1 Aligning Fabric with the Seam Guide
To align fabric with the seam guide, place the edge of the fabric against the guide, ensuring it matches your desired seam allowance․ This ensures straight stitching․
4․2 Adjusting the Seam Guide for Different Seam Allowances
To adjust the seam guide for various seam allowances, loosen the screw on the back of the presser foot and slide the guide to the desired width․ Secure it tightly․ This ensures accurate stitching for different projects․ Use the markings on the needle plate as a reference for consistent results․ Proper adjustment guarantees professional-looking seams every time․
Tips for Choosing the Right Seam Guide
Select a seam guide based on your sewing machine’s compatibility, fabric type, and stitch width requirements․ Ensure it aligns with your project’s specific needs for optimal results․
5․1 Considering Stitch Width and Fabric Type
When choosing a seam guide, consider the stitch width and fabric type․ Thicker fabrics may require a wider stitch width, while delicate materials need a narrower setting․ Ensure the seam guide has markings that accommodate your project’s seam allowance․ Aligning the guide with your fabric’s edge ensures straight stitching․ For heavy fabrics, a magnetic guide may be more stable, while a ruler guide works well for lighter materials․ This ensures precision and adaptability across various sewing tasks․
5․2 Compatibility with Your Sewing Machine
Ensure the seam guide is compatible with your sewing machine․ Check if it fits your machine’s make and model, especially for magnetic or ruler-type guides․ Some guides are universal, while others are machine-specific․ Verify the attachment method, whether it clips on or magnetically adheres․ Adjustments may be needed for proper alignment․ Consult your machine’s manual for compatibility and installation tips to ensure the seam guide functions effectively and enhances your sewing experience․

Maintenance and Care of the Seam Guide
Regularly clean the seam guide with a soft cloth to remove debris․ Store it in a dry place to maintain accuracy and prevent damage over time․
6․1 Cleaning the Seam Guide
Regular cleaning ensures optimal performance․ Use a soft, dry cloth to wipe away dust and debris․ For stubborn stains, dampen the cloth slightly but avoid harsh chemicals․ Magnetic guides may require gentle removal of residue with a specialized cleaner․ After cleaning, let the seam guide air dry to prevent rust or damage․ This maintenance routine keeps the guide accurate and functional for precise stitching․
6․2 Storing the Seam Guide Properly
Store the seam guide in a protective case or pouch to prevent damage․ For magnetic guides, avoid exposure to strong magnetic fields to maintain their strength․ Ruler guides should be kept flat to prevent warping․ Clean the guide before storage to remove dirt or oils․ Store in a cool, dry place away from direct sunlight to prevent rust or degradation․ Proper storage ensures the seam guide remains accurate and ready for future use․
Troubleshooting Common Issues with the Seam Guide
Troubleshooting involves checking alignment, ensuring proper attachment, and verifying magnetic strength․ Adjust the guide if fabric drifts or stitches are inconsistent for optimal sewing performance․
7․1 When the Seam Guide Does Not Align Properly
If the seam guide doesn’t align properly, check its attachment to the needle plate or presser foot․ Ensure it’s parallel and secured tightly․ Adjust the guide’s position to match your desired stitch width․ Verify that the magnetic strength is sufficient or reattach if necessary․ Misalignment can cause uneven stitching, so recalibrating the guide or consulting your machine’s manual may be needed for accurate results․ Proper alignment ensures straight, consistent seams in your sewing projects․
7․2 Adjusting the Seam Guide for Consistent Stitching
To ensure consistent stitching, adjust the seam guide by sliding it along the needle plate to your desired seam allowance․ Use the markings on the guide for accuracy․ For magnetic guides, check the alignment with the machine’s edge․ If using a ruler guide, secure it firmly to maintain stability․ Proper adjustment prevents wobbling and ensures straight, uniform stitches, enhancing the overall quality of your sewing projects․ Regular checks and minor tweaks can maintain optimal performance․
Advanced Techniques Using the Seam Guide
Use the seam guide to sew multiple layers with precision and achieve continuous straight stitching for professional results, enhancing your sewing efficiency and accuracy effortlessly․
8․1 Sewing Multiple Layers with Precision
Using a seam guide ensures accurate alignment when sewing multiple fabric layers․ It helps maintain consistent stitching, preventing shifting or misalignment, especially useful for quilting or heavy-duty projects․ By setting the guide parallel to the presser foot, you can evenly sew through thick materials without bunching․ This technique enhances durability and professional finish, making it ideal for complex sewing tasks that require precision and reliability․
8․2 Using the Seam Guide for Continuous Straight Stitching
The seam guide is invaluable for achieving continuous straight stitching, especially over long seams․ By aligning the fabric edge with the guide, you maintain a steady, consistent stitch line․ This is particularly useful for garments, home decor, and large projects․ The guide’s markings allow for easy adjustment, ensuring uniformity․ It minimizes the need for frequent realignment, saving time and enhancing the overall quality of your sewing projects with precision and efficiency․
Expert Tips for Maximizing Seam Guide Efficiency
Experts recommend using a seam guide for consistent stitching and fabric alignment․ It enhances precision, especially for straight lines and multiple fabric layers, ensuring professional results every time․
9․1 Using the Seam Guide for Various Fabric Types
The seam guide is versatile for all fabric types, from delicate silk to thick denim․ For heavier fabrics, adjust the guide to accommodate thickness․ For stretchy materials, align edges carefully to maintain stability․ Use a walking foot for layered or bulky fabrics to ensure smooth stitching․ Experiment with different guide positions to achieve perfect results across various textures and weights, enhancing your sewing projects’ overall quality and appearance․
9․2 Combining the Seam Guide with Other Sewing Tools
Enhance your sewing experience by pairing the seam guide with other tools like walking feet or rolled hem feet․ A walking foot helps manage thick fabrics, while a rolled hem foot perfects edges․ Use a zipper foot for precise zipper alignment․ These combinations ensure accuracy and versatility, allowing you to tackle complex projects with confidence․ Experiment with different tool pairings to maximize efficiency and achieve professional-grade results in your sewing projects․

10․1 Summary of Key Benefits
The seam guide enhances sewing precision and efficiency, ensuring straight stitching and consistent seam allowances․ It simplifies fabric alignment, reduces errors, and saves time․ Versatile for various fabrics and machines, it boosts creativity and productivity, making it an indispensable tool for sewists of all levels, from beginners to professionals, ensuring high-quality results in every project․
10․2 Final Thoughts on Using a Seam Guide
Using a seam guide is a game-changer for achieving professional-grade stitching․ It ensures accuracy, saves time, and enhances creativity․ Whether you’re a novice or an expert, a seam guide offers unmatched precision for various fabrics and projects․ Its versatility and ease of use make it an indispensable tool for any sewing machine․ Embrace the seam guide to elevate your sewing experience and unlock new possibilities in your crafting journey․